How to light a campfire
Wanting tips on how to light a campfire. There is nothing better than a fire, and I would go as far as to say that a campfire is a necessity on a camping trip.
Indispensable for warming toes, toasting marshmallows, telling stories, cooking food and practicing survival skills. Campfires are also a great way to bring people together. Just remember to check that your campsite allows fires, as many don’t.
Even if you’re a camping newbie, campfires are not as difficult to make as most people think.
Fires need three things: fuel, oxygen and heat.
Follow the steps below and you’ll have a toasty fire roaring in no time!

The boring bit- fire safety
Remember to keep a bucket of water near in case you need to put out the fire quickly.
Be especially careful on windy days as sparks can make the fire spread.
Make sure your fire is contained. The best way to do this is by using a fire pit if your campsite offers one, but if not, make your own.
Set up the fire on bare earth, at least 4 meters from any tents or bushes, within a circle of large stones. If there are no stones available then use big pieces of greenwood, which you wet down regularly, to contain your fire.
Collecting your firewood
The first, and most important part of firemaking is finding the wood and tinder.
If you already know about tinder and kindling then just skip to the next section for a step-by-step on how to light a campfire.
Tinder
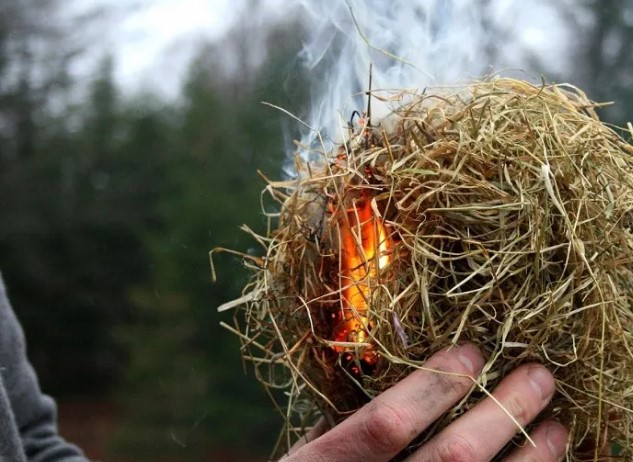
Tinder is what you will use to start the fire, easily combustible and no bigger than a matchstick.
Tinder can be easily found in nature, you are looking for dry grass, shaved bark, dry leaves or pine needles.
Collect about a handful or two, as you only need enough to get the fire started. If there’s rainy weather forecast, or you just want to bring some good tinder with you, then cotton balls work very well as they burst into flames quickly.

Kindling and fuel
The next type of wood you need is kindling.
Kindling should be no bigger than your thumb (although the kindling you can buy from a campsite or garage often is a bit bigger than this). Cedar bark or small twigs work well and you want to collect a good supply (a few armfuls) of kindling.
The last type of wood you need is the ‘fuel’- the larger pieces of wood. Fuel should at minimum be as thick as your wrist.
For both kindling and fuel you also don’t want to use greenwood that has just been cut as this doesn’t burn very well, and produces a lot of smoke. Instead, look for wood that has been dried out, for example from dead trees or fallen twigs and sticks.
Most campsites prohibit picking up of forest wood for environmental reasons, but you can buy bags of wood that contain kindling and fuel, which is often the easiest way to get the right kind of wood that burns well.
If your campsite doesn’t sell wood, you can usually find bags of kiln-dried wood at local garages.
Making the fire
Start by piling a handful of your kindling in the centre of the fire pit.
If you’re feeling less confident in your fire-starting abilities or if it’s raining then you could always buy firelighters to give yourself a leg-up!
Next place kindling over the tinder/firelighters. There are a few ways to do this. The easiest options are to make a cross shape by criss-crossing the kindling over tinder, or to balance pieces of kindling against each other- making a tipi shape.
You can also drive two sturdy long pieces of kindling into the ground and lean pieces of kindling against one of the sticks, creating a ‘lean-to’.
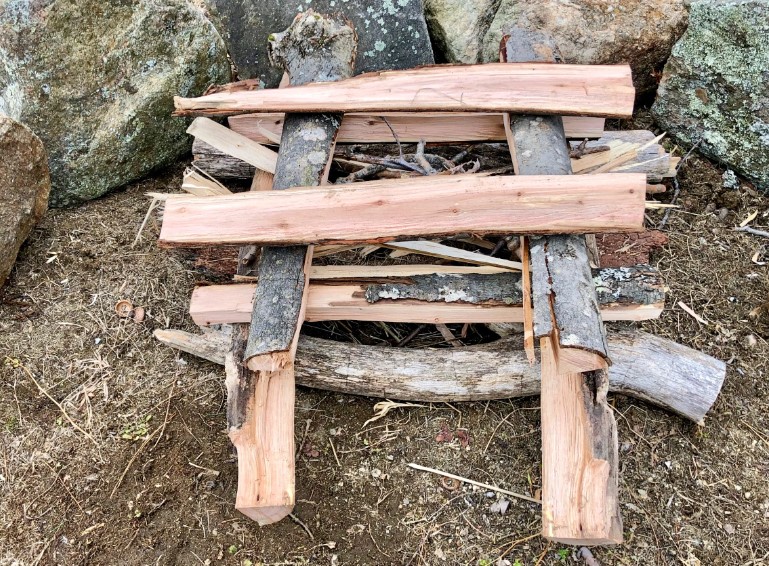
Or create a square shape by stacking pieces of kindling at right angles and then placing smaller bits of kindling over the tinder in the centre. This is called the ‘log-cabin’ method and is shown in the picture below.

Once you have set up your wood just light the tinder using matches or a lighter, this should make the kindling also catch light.
Or, you could practice your survival skills by using a flint and steel- trying to light the tinder by making sparks.
If you’re struggling to light the tinder, blow on the small flames gently, and cup them with your hands to protect from the wind.
The secret to long-lasting fires
Once the kindling has set alight, start to add your fuel – larger pieces of wood.
Continue to add logs until your fire is the size you want.
Make sure to keep a supply of kindling going so that if the fire starts to wane you can add some smaller pieces of wood to get it started again.
You can also re-light the fire by blowing on the embers to ignite them.
Cooking campfires
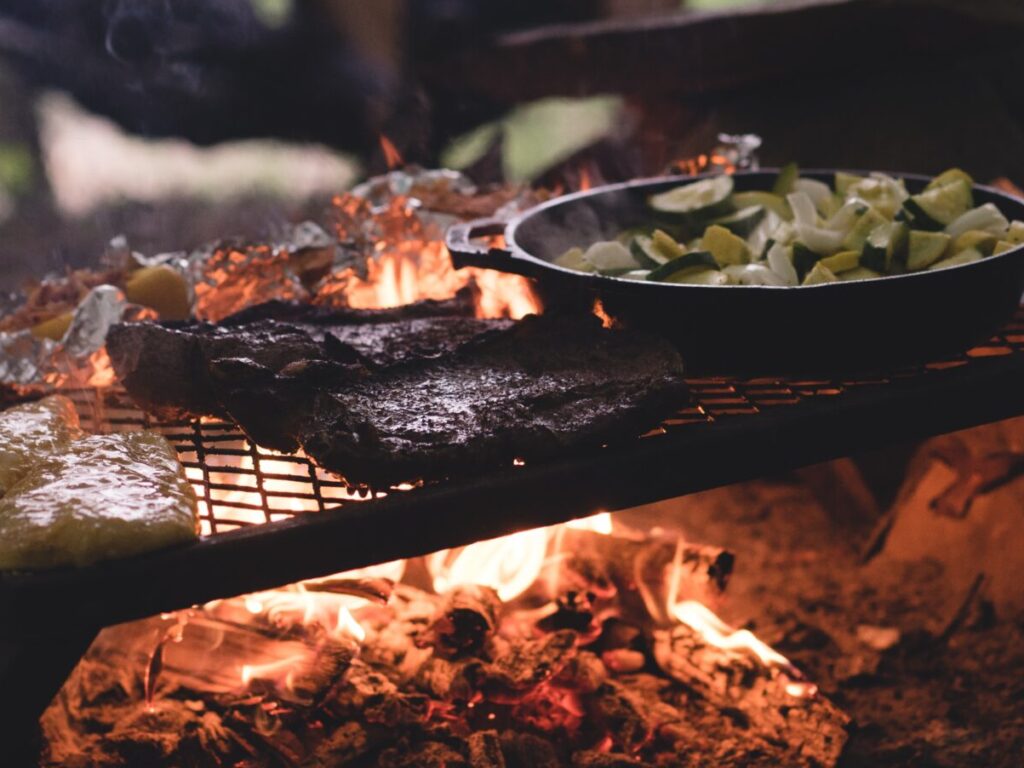
Once you have mastered making your campfire, cooking on it is the next step. There is a whole section of reading for Campfire Cooking ideas and inspiration.
Food tastes so much richer and more flavoursome when it has been cooked over a campfire, and it is extremely satisfying to make a fire and cook on it yourself.
In order to make a fire suitable for cooking on, you need embers.
You also want to make sure you use hardwood, which burns more slowly, so that you can get red-hot coals for cooking on rather than big flames.
If you want to learn more about how to set up a cooking campfire, have a read of simple pleasures – back to basics camping in which I go into much more detail on campfire cooking.
Or some tasty vegan recipes check out Vegan campfire cooking ideas.

Adverse weather forecast – don’t fear!
Although it takes a little more effort to set up, you can still enjoy a campfire in rainy or windy weather.
To set up a campfire on damp ground, make your own fire pit by setting the fire on a circle of stones (rather than in the middle of a donut shape).
You can also collect dry wood to burn from underneath trees if you’re wild camping.
Or even better, purchase dry wood from your campsite shop if you’re camping at a campground.
If you want more details on setting fires in the rain why not check out How to keep dry when camping.
To set up a fire in the wind, location is key.
Try to set up your fire downwind from a large rock, but if there aren’t any near your campsite, then create your own sheltered spot. You can string up a large tarpaulin at a safe distance from your fire to act as a windbreak, or dig a hole about a foot deep to protect your fire from the wind.
Another option is to set up your fire by placing a large log downwind, leaning your kindling against the log and setting fire to the tinder underneath the kindling.
I hope that these tips will help you to make the perfect campfire on your own camping trip, whatever the weather.
Here’s me signing out, and thank you so much for reading.
Lily Crooke/ Environmental and Recreational author
